
Overview of Budgets
MonkeyPod makes it easy to create budgets and track spending as it happens. This article walks you through how to create a budget, then explore its performance using the Report, Visualize, and Monthly Actuals tabs.
How do budgets work in my MonkeyPod?
When you set up a budget in your MonkeyPod, you choose a specific scope for the budget. The scope can be based on:
- Organization: The budget scope covers your whole organization.
- Class: Budget scope is restricted to a specific class of expenses.
- Grant: Budget is tied to a grant.
- Tag: Budget is tied to transactions with a specific tag.
All of these budget types allow you to track budgeted versus actual amounts in real time. For example, if you create a budget based on a tag for a particular program, each time you enter a transaction that uses that tag it is automatically reflected in the "actual" amount for your budget.
Where do I enter a budget in my MonkeyPod?
Budget tools can be found by selecting the Finance menu.

Select List Budgets to view all your current budgets. To create a new budget, choose Create a new budget at the top of the list, or choose Create Budget from the Finance menu.

When creating a new budget, first choose its scope: does it apply to your whole organization, or just to a specific class, tag, or grant?

Then give the budget a name—be specific enough so you and your team know what it covers.
Next, enter the start and end date for the budget. Only transactions that fall in that date range will be represented in the budget.
Marking a budget as private
Sometimes you need to keep a budget private. In those cases, select the checkbox under Private budget? and choose only the users in your MonkeyPod who should have access.
Entering budget lines
Next, decide if you're going to manually enter the budgeted amounts, or if you're importing them. Make your selection under the "How do you want to enter budget lines?" heading by choosing either Manually or CSV upload.
If you're manually entering the budget lines, work your way through the various income and expense accounts listed on the screen, entering the budgeted amount for each. You can also enter notes about a particular line item in your budget, and those notes will appear below the account name on the budget.
If you're uploading your budget lines, follow the onscreen instructions that appear when you choose the CSV upload option.
How do the actuals get into my budget?
When you enter a revenue or expense transaction, MonkeyPod automatically compares it to your budgets. If the transaction falls within a budget’s date range and scope, it’s included as actual spending or revenue ("actuals") for that budget.
For example, the transaction below would record $500.00 of actuals for account 9000: Travel for a budget with any of the following scopes:
- Organization level
- Class level, tied to Fundraising
- Tag level, tied to the 2023 Film Festival tag
- Grant level for the Community Challenge grant

Reviewing your budget's performance
Once a budget has actuals coming in, you'll be able to use the built-in budget reports to assess whether spending and income are on track. Open a budget from Finance > List Budgets by clicking on the name, and see how it's tracking.
Use the filters at the top of the page to adjust the date range for reported actuals to look at a shorter window within the budget period, and choose whether to include accounts without budgeted or actual activity.
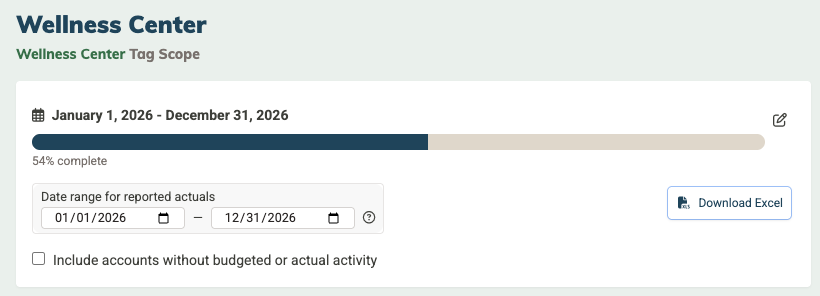
Just below those filters, you'll see the three tabs for reviewing your budget's performance: Report, Visualize, and Monthly Actuals.
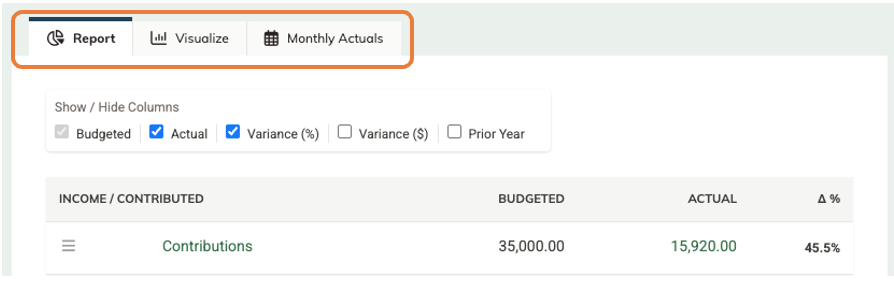
The Report tab
The Report tab lists every account with its budgeted and actual totals. (Use the checkbox in the filters section above to show accounts without budgeted activity.) Use Show / Hide Columns to choose which columns appear:
- Budgeted: the budgeted amount for the account.
- Actual: actual activity recorded against the account so far.
- Variance (%) and Variance ($): the difference between budgeted and actual, shown as a percentage or a dollar amount.
- Prior Year: actuals from the same calendar span one year earlier (for example, a January–May report also shows January–May from the prior year). This column is hidden by default and only available for non-grant budgets. The Prior Year column doesn't include its own variance calculation, since it's meant for a side-by-side comparison rather than a strict measure of over/under performance.
The Visualize tab
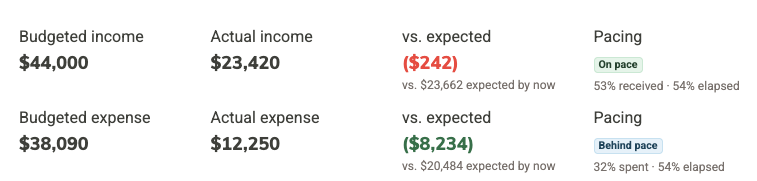
The Visualize tab turns your budget-to-actuals numbers into charts, using whatever date range and filters you've applied. The tab has three parts:
- Summary totals: budgeted and actual income and expenses, plus how each compares to what you'd expect by this point in the budget period. While the period is still in progress, a pacing indicator shows whether you're on pace, ahead, or behind.
-
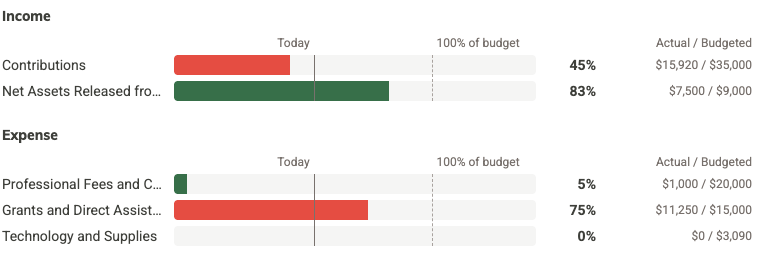
Per-line progress bars: one bar per account, split into Income and Expense sections. Each bar fills in to show the percent of budget spent or received, with Today and 100% of budget marked on the bar. Bars are color-coded by how healthy that account's activity looks: for expenses, going over budget shows red; for income, exceeding budget shows green, since more revenue than expected is a good thing.
-
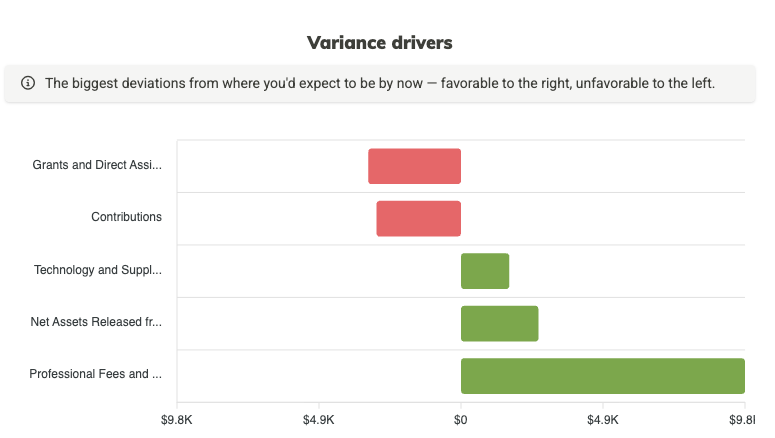
Variance drivers: charts the accounts that are furthest from where you'd expect them to be by now, so you can quickly spot what's driving your overall variance.
Note: Since the pacing figures assume your budget is spread evenly across its period, which isn't always a safe assumption, treat them as a general guide rather than a strict target.
The Monthly Actuals tab
The Monthly Actuals tab breaks your income and expense actuals down into a month-by-month matrix, with a Total column at the end.
This tab shows actuals only: it doesn't split your budgeted amount out by month, since budgets don't necessarily expect evenly divided activity across the period. To compare actuals against your full-period budget, use the Report tab.
When you use the Download Excel button to generate a spreadsheet of your budget, the Monthly Actuals report is included in the second tab of the spreadsheet.
Note: This is available for non-grant budgets only, since a grant's full amount is typically recorded as income up front.
Frequently Asked Questions
Can you do a rollup of multiple budgets?
Yes! Check out our article on Budget Roll-Ups to learn how to do this.
Can I import my budget lines with a CSV upload?
Yes! Simply select CSV upload and follow the onscreen instructions there.

Can I export my budget?
Easily! Select the Download Excel button in the filters panel at the top of the page to download the budget that's displayed, along with the Monthly Actuals report as its own tab in the spreadsheet.