How to Record an Expense
MonkeyPod makes it easy to enter and track all of your expenses in one place. Whatever way you're paying for something (by check, credit card, debit card, ACH, or a bill to pay later), you'll record it in the same spot. This article walks through that process and answers a few common questions along the way.
Where do I record expenses in my MonkeyPod?
Choose Finance from the main menu. Under "Income & Expenses," select Record an Expense. (Keyboard shortcut: Shift-Alt-E for Windows; Shift-Option-E for Mac.)
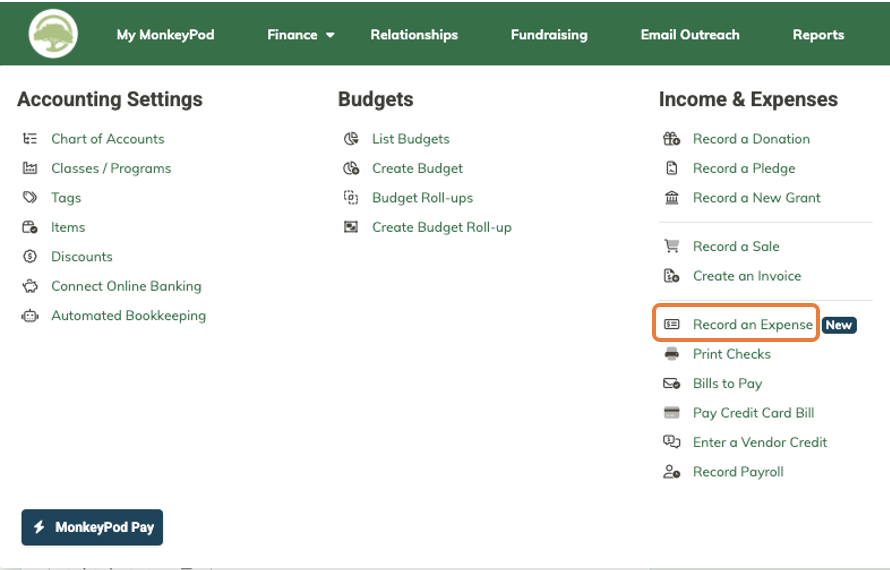
New! This single screen now covers what used to be separate menu items for recording payments by credit card, check or debit card.
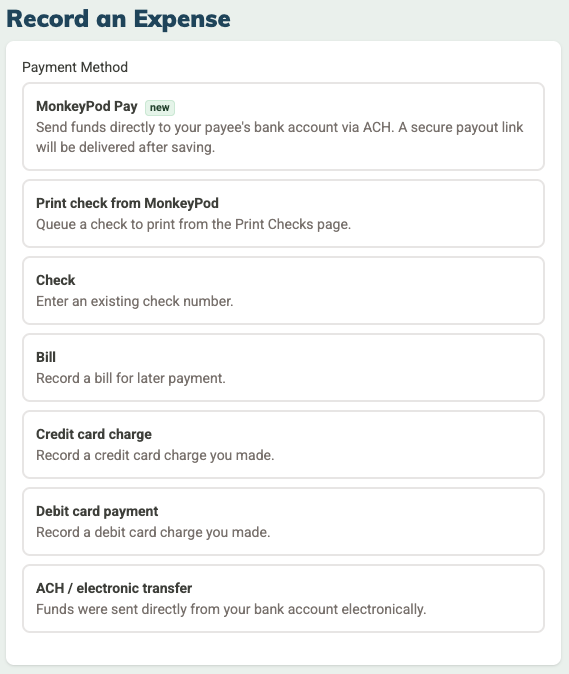
On the Record an Expense page, first choose a Payment Method:
- Print check from MonkeyPod: Queue a check to be printed later from the Print Checks page.
- Check: Record a check you've already written by hand, using its existing check number.
- Bill: Record a bill you've received, to be paid later.
- Credit card charge: Record a charge you made on an organization credit card.
- Debit card payment: Record a payment you made with a debit card.
- ACH / electronic transfer: Record funds sent directly from your bank account electronically.
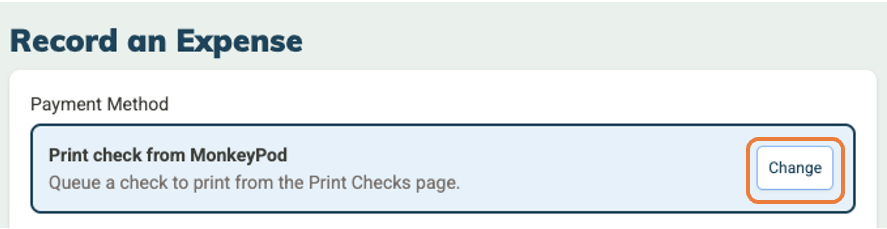
If you select a payment method, and then need to switch to another payment method, click the Change button. Any details you've already entered will just carry over to the form for the new method.
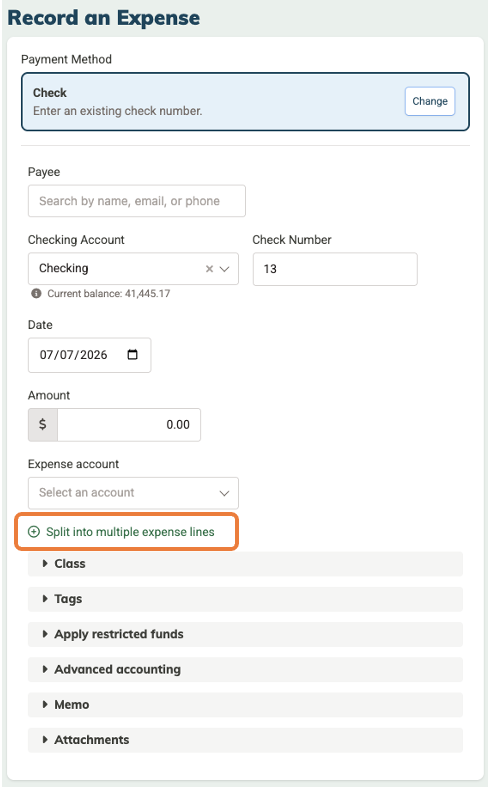
Once you choose a payment method, the form updates for you to record the relevant details. Most methods share fields like who you're paying (or the vendor), the account the payment is coming from, date, amount, and the expense account the cost should be recorded to.
Other option fields include:
- Class: attribute the expense to a program or department. This is important for generating your Statement of Functional Expenses, and keeping track of where your money is spent.
- Tags: apply one or more tags for more granular reporting.
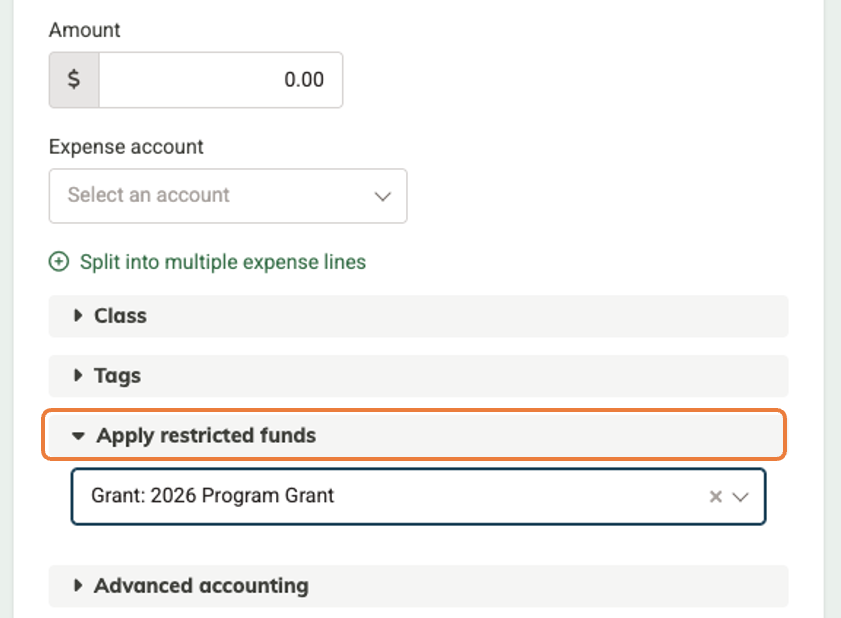
- Apply restricted funds: designate the expense against a specific grant or restricted fund.
- Advanced accounting: add extra debit or credit lines for less common accounting adjustments. Most users won't need this.
- Memo: add a note about the transaction for your own records.
- Attachments: drag and drop a receipt or other file to attach it directly to the expense.
What if I want to break out the expenses in the payment?
Look for the Split into multiple expense lines link if you need to divide a single payment across more than one account, class, or tag.
When all the details are entered, click the Save button at the bottom of the page. Click the down arrow on the Save button to choose from these other options:
- Save & Record Another: Saves the transaction and brings up the Record an Expense screen for you to quickly start with a new expense.
- Save & Print: Available only when the payment method is Print Check from MonkeyPod. This option saves the transaction and takes you directly to the Print Checks page.

Tip for bookkeeping power users!
If you're often working with restricted funds or adding notes to expenses, you can change your MonkeyPod organization settings to default to always expanding those fields. From the main menu choose Organization Settings > Accounting > Policies & Conventions, and select Line item details. Choose the option to auto-expand adding notes and applying restricted funds.
With that setting on, those fields will be ready for input as you enter your expense, without the extra steps to expand them.

How can I edit an expense once it's been recorded?
To edit an expense transaction, look for the action menu on the upper left side of the transaction page. There you'll find all the options available for editing that particular type of transaction. This might include options for editing, deleting or voiding the transaction. For example, here is the menu for a check transaction that has yet to be deposited.
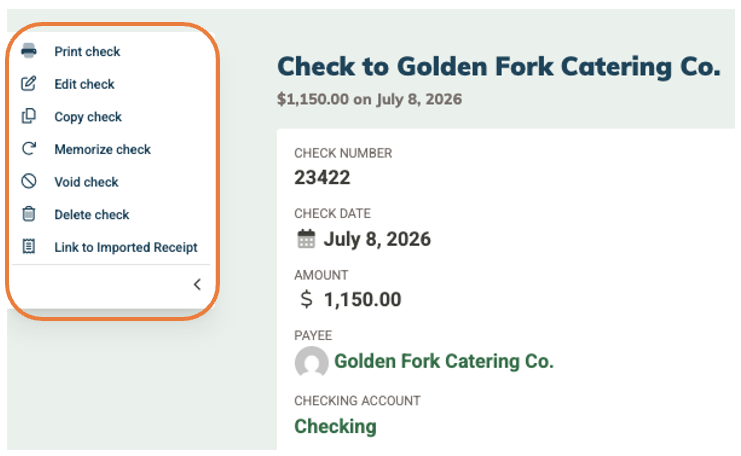
Note: Certain options will be disabled if they are no longer an option for a particular transaction. For example, if you have already recorded a check as being deposited, you will not be able to delete it here unless you first delete it from the deposit transaction.
Frequently Asked Questions
I have a bunch of receipts to go through! Is there an automated way to do this?
Yes, there is! You can upload or email receipts to your MonkeyPod and MonkeyPod will extract the vendor, amount, and date from them to help you streamline the editing of your expenses. You can even have other team members email their receipts to your MonkeyPod for you or a bookkeeper to review and add later. See How to Upload Receipts and Record Expenses with AI for details.
Why do ACH and debit card payments show up as "Check" transactions?
You might notice that in your MonkeyPod, online and debit card payments appear as Check transactions, with "Electronic payment" or "Debit card payment" filling in for a check number. This is common practice because online, debit card, or check payments all do the same thing from a bookkeeping standpoint: they move money directly out of a bank account on a given date, with no real difference in the underlying journal entry. Since the accounting is identical, MonkeyPod records all of them under the same transaction type, and simply uses the reference number field to note how the payment was actually made.
How do I track expenses related to a grant or other restricted funds?
First, enter the grant (or for restricted funds, set up the restricted account under Finance > Chart of Accounts, under the Net Assets tab). Then when recording an expense, expand the Apply restricted funds section and select the relevant grant or fund.
What if I want to split an expense?
Click Split into multiple expense lines. Each line gets its own amount, account, class, and tags, along with its own Apply restricted funds and Add notes options. Click Add an expense line to add as many additional lines as you need.
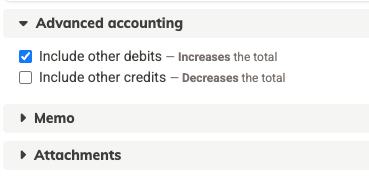
When would I use the option to include other debits or credits?
Most people won't need this option when entering expenses, but it's here if you do! The Advanced accounting section lets you fold an adjustment to a different account into the same check or payment, instead of creating a separate transaction. Checking Include other debits adds a line where you can debit any account in your chart of accounts, not just an expense account, which increases the total amount of the payment. Checking Include other credits does the opposite: it adds a line to credit an account, which decreases the total. This would be useful, for example, if you were writing one check that covers a new expense and also pays down part of an existing bill or loan, so the check shows a single total while your books correctly split the amount between the expense account and the liability account. Most users won't need this section.
What are Accounts, Classes, and Tags?
Check out this article for lots of great detail about accounts, classes, and tags and how they're used to help you track expenses.
Can I attach a receipt when I record an expense?
Yes. Expand the Attachments section on the expense form and drag and drop a file, or click to select one from your computer.
Where can I review expenses I've entered? Are there any relevant reports?
From the main menu, choose Finance > Search Transactions to search for specific types of transactions. The Reports menu also includes a number of options under the "Accounting & Finance" heading to help you review your expenses, such as Income & Expense by Month, Income & Expense by Class, Income & Expense by Restricted Fund, and the statement of Functional Expenses.
What's the difference between Record an Expense and Bills to Pay?
Record an Expense is where you enter a new expense, including a bill you haven't paid yet. Bills to Pay (also in the Finance menu, under "Income & Expenses") is where you go later to actually pay bills you've entered. See How to Record Payment of Bills for more on that step.