How to Setup & Send Email Campaigns
An email campaign is any bulk email you send out to your supporters through MonkeyPod’s Email Outreach tools—such as newsletters, appeals, or event announcements. Email campaigns are typically based on a template you have created to suit the communication style and needs of your organizations, and they are sent to your chosen email list maintained in your MonkeyPod.
Where do I find email campaigns in my MonkeyPod?
You can find your email campaigns (or create new ones) by choosing Email Outreach from the main menu, then selecting View and Create Campaigns.

All of your campaigns are listed here with details about them, including delivery status, the list used for the campaign, number of emails in the list, open and click rates, and the date sent.
Use the various filters above the list to filter by delivery status, list, creator, or campaign name.

In addition to the default list view for your campaigns, you can select the Calendar View option to view your important campaign dates in a calendar layout.

How do I create a new email campaign?
New email campaigns are typically based on a template that reflects the style of your organization and the type of communication you're sending. This helps to give your communications a consistent, professional look—so, be sure to check out MonkeyPod's Email Templates to setup templates that have the right look and feel for your organization.
All campaigns are also sent to email lists of subscribers, so before you can add a new campaign, you need to create an Email List.
Once you have created an email list and have a template you'd like to use, you're ready to add a new campaign by selecting Add Campaign from the main Campaigns page.

MonkeyPod prompts you to enter the important details about your campaign

- Campaign Name: The name of the campaign. Be sure to give your campaign a thoughtful name that will make it easy to identify in a list of campaigns. The campaign name is only shared internally, unless you choose to include the campaign name in the body of the email message using merge tags.
- Email List: The email list of recipients for the campaign you'll be sending.
- (Optional) Template: Select a template as the basis for this campaign. Your MonkeyPod will copy the template's layout and content into this campaign. Any changes you make to the campaign message will not be saved back to the template.
- (Optional) Target Send Date: This creates an action item to remind you to check the template! Your target send dates will also show up on the campaign Calendar View, accessible from the Calendar View option at the top of the Campaign page.
Select the Create Campaign button to save that information and move on to setting up the details of your campaign using the tabs at the top of the screen: Settings - Recipient Targeting - Content - Action Items - Delivery. The options in each of these sections are described below.

Configuring the basic "Settings" for your campaign
Once you create your campaign, you have the option to adjust a variety of settings.
Under the Settings tab, you can name your campaign, provide the subject line for the email message, enter the email address and name of the sender as well as the reply-to email/name that will receive responses when someone clicks “Reply".

Important! You must verify the sending domain for the "From Email". This is an important step to show email providers that they can trust that this message came from a legitimate sender. MonkeyPod will alert you here if your email address or domain has not be verified. See Learn About Email Deliverability (DNS Settings) for details.
Fine-tuning recipient targeting for the campaign
By default, when sending a campaign, the email will go to everyone who is a subscriber on the recipient list. If you want to narrow the target audience to a subset of those subscribers, select Send to list segment. Identify the desired segment based on role, true/false custom attributes and/or whether the person opened or received a previous email campaign. Learn more about segmenting list in How to Segment Your Email Lists in MonkeyPod.

Entering the content of the campaign message

If you selected an Email Template when you initially set up the campaign, the content of the message will be pre-filled, based on that template. Use the editor tools to complete the message, adding the necessary text, images, and other content for this campaign.
Remember, you should be modifying the Content for this Email Campaign. not the template itself.
Reset Template
Choose the Reset template link at the top of Content section if you want to discard all of your edits and revert back to the original template or choose a different template.

Careful! Choosing Reset template will get rid of all of your changes, so be sure that you are sure!
Sending a test message for the campaign
Once you have the content of your message together, select the Delivery tab to move on to reviewing and sending your message.

Send a test message
We recommend that you send yourself a test email before sending the whole campaign.
-
Select Send Me a Test.
-
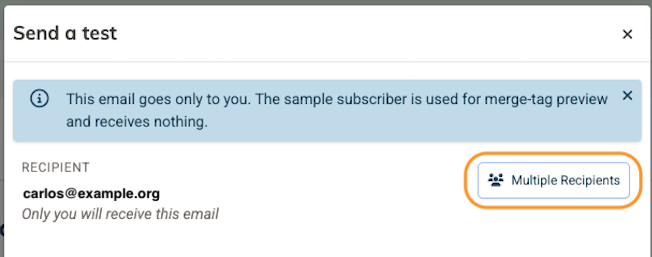
Choose the recipients. The test message will be sent to only you by default. Select Multiple Recipients if you want the test message to go to other MonkeyPod users in your organization.
-
Select a relationship to use for the test email. MonkeyPod displays a relationship that it will use for the preview test message, chosen from the current list of campaign recipients. Click Shuffle to have it randomly pick another relationship, or click Change to select a specific recipient to use for the preview.

- Select Send Test to send the test message. If you have used merge tags in the campaign, they will be formatted according to the information available for the relationship you chose for the preview. Look for the test message in your inbox and verify that everything is good to go!


This test email is sent only to you or other designated recipients. The relationship chosen for the preview is used only as an example for merge-tag preview and won't receive a copy of the test email.
Setting up the delivery of the email campaign
Once you've sent a test message and confirmed that all's well, review the content in the Delivery tab. MonkeyPod will display a green checkmark next to each item that is complete. If you see any alerts about an unverified sending domain, please see Learn About Email Deliverability (DNS Settings).
Finally, confirm when you'd like to send the campaign using the Timing options. The Timing setting allows you to choose whether to send the email now or at a scheduled future time.

Ready to send!
When you are ready to send, select the checkbox verifying that you are absolutely, positively certain you are ready to send and choose Send Now (or Schedule Delivery if you're scheduling delivery on a future date).

How can I monitor the success of my campaign after it is sent?
Once you send your campaign, refresh the screen and watch your numbers update in the Summary section. Click the links in the summary table to view details about who opened, clicked, or unsubscribed to this campaign.

You can return to view these statistics for any sent campaign by clicking the name of the campaign in the Campaigns list.
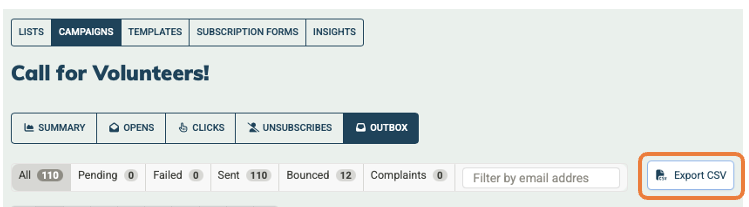
If you would like to compare the rates across multiple campaigns, first view the list of campaigns by clicking the Campaigns tab at the top of the screen. Then filter for the campaigns you'd like to compare, and choose Export CSV to generate a spreadsheet of the summary statistics for those campaigns.

Frequently Asked Questions
Why am I only seeing some of my Custom Attributes when I am trying to send to a specific segment?
You can only see Custom Attributes that are of the True/False type. If you would like segment a campaign using other attributes, we suggest using the Advanced Search and making an email list from there.
Can I add an Action Item so that someone from my organization can get their eyes on this email before I send it out?
Yes! Simply select the Action Items tab, and add an action item right from the campaign!

Can I download a list of the unsubscribes or bounces from an email campaign?
Yes, just look for the Export CSV buttons on the campaign's Unsubscribes and Outbox tabs. Select that button the Unsubscribes tab to generate a file of all those who unsubscribed. Use the Export CSV option on the Outbox tab to also include any opens, bounces, and reasons for unsubscribing.
Want more amazing video content? Check out our YouTube channel!